1 Spring Boot
1.1 Spring Boot概述
Spring Boot设计目的是用来简化Spring应用的创建、运行、调试、部署等。使用Spring Boot可以做到专注于Spring应用的开发,而无需过多关注XML的配置。Spring Boot使用“约定优于配置”的理念,简单来说,它提供了一堆依赖打包,并已经按照使用习惯解决了依赖问题。
1.2 Spring Boot的核心功能
- 可独立运行的Spring项目:Spring Boot可以以jar包的形式独立运行。
- 内嵌的Servlet容器:Spring Boot可以选择内嵌Tomcat、Jetty或者Undertow,无须以war包形式部署项目。
- 简化的Maven配置:Spring提供推荐的基础 POM 文件来简化Maven 配置。
- 自动配置Spring:Spring Boot会根据项目依赖来自动配置Spring 框架,极大地减少项目要使用的配置。
- 提供生产就绪型功能:提供可以直接在生产环境中使用的功能,如性能指标、应用信息和应用健康检查。
- 无代码生成和xml配置:Spring Boot不生成代码。完全不需要任何xml配置即可实现Spring的所有配置。
1.3 SpringBootB的相关好处
- 使用 Spring 项目引导页面可以在⼏秒构建⼀个项⽬;
- 方便对外输出各种形式的服务,如 REST API、WebSocket、Web、Streaming、Tasks;
- 非常简洁的安全策略集成;
- ⽀持关系数据库和⾮关系数据库;
- ⽀持运行期内嵌容器,如 Tomcat、Jetty;
- 强⼤的开发包,⽀持热启动;
- ⾃动管理依赖;
- ⾃带应⽤监控;
- ⽀持各种 IED,如 IntelliJ IDEA 、NetBeans。
和Spirng程序相比,SpringBoot程序在开发的过程中各个层面均具有优势
| 类配置文件 | Spring | SpringBoot |
|---|---|---|
| pom文件中的坐标 | 手工添加 | 勾选添加 |
| web3.0配置类 | 手工制作 | 无 |
| Spring/SpringMVC配置类 | 手工制作 | 无 |
| 控制器 | 手工制作 | 手工制作 |
2 Spring Boot快速创建
2.1 使用Spring Initializr引导页面进行创建
①创建新模块,选择Spring Initializr,并配置模块相关基础信息

②选择当前模块需要使用的技术集

③开发控制器类
package com.liu.controller;

import org.springframework.stereotype.Controller;
import org.springframework.web.bind.annotation.GetMapping;
import org.springframework.web.bind.annotation.RequestMapping;
import org.springframework.web.bind.annotation.RestController;

@RestController
@RequestMapping("/user")
public class UserController {

    @GetMapping
    @RequestMapping("quick1")
    public String findUsers() {
        System.out.println("Spring boot is running");
        return "Spring is running";
    }
}④运行自动生成的Application类

2.2 进入Spring Boot官网进行创建
①点击Spring Initializr后进入到创建SpringBoot程序的界面上,下面是输入信息的过程,和前面的一样,只是界面变了而已,根据自己的要求,在左侧选择对应信息和输入对应的信息即可。右侧的ADD DEPENDENCIES用于选择使用何种技术,和之前勾选的Spring WEB是在做同一件事,仅仅是界面不同而已,点击后打开网页版的技术选择界面
②所有信息设置完毕后,点击下面左侧按钮,生成一个文件包,保存后得到一个压缩文件,这个文件打开后就是创建的SpringBoot工程文件夹。解压缩此文件后,得到工程目录,在Idea中导入即可使用,和之前创建的东西完全一样。下面就可以自己创建一个Controller测试一下是否能用了。

2.3 使用阿里云地址创建Spring Boot项目
①创建新模块,选择Spring Initializr,选择Server URL为start.aliyun.com,并配置模块相关基础信息

②选择当前模块需要使用的技术集

③运行自动生成的Application类进行测试

3 Spring Boot简介
3.1 parent:进行版本的统一管理
①parent概述
SpringBoot为了解决最合理的依赖版本配置方案,于是将所有的技术版本的常见使用方案都给开发者整理了出来,以后开发者使用时直接用它提供的版本方案,就不用担心冲突问题了,相当于SpringBoot做了无数个技术版本搭配的列表,这个技术搭配列表的名字叫做parent。
parent自身具有很多个版本,每个parent版本中包含有几百个其他技术的版本号,不同的parent间使用的各种技术的版本号有可能会发生变化。当开发者使用某些技术时,直接使用SpringBoot提供的parent就行了,由parent帮助开发者统一的进行各种技术的版本管理。
②Spring Boot项目中引用的parent
项目中的pom.xml中继承了一个坐标,打开后可以查阅到其中又继承了一个坐标,这个坐标中定义了两组信息。第一组是各式各样的依赖版本号属性,下面列出依赖版本属性的局部,可以看的出来,定义了若干个技术的依赖版本号;第二组是各式各样的的依赖坐标信息,可以看出依赖坐标定义中没有具体的依赖版本号,而是引用了第一组信息中定义的依赖版本属性值。
<parent>
    <groupId>org.springframework.boot</groupId>
    <artifactId>spring-boot-starter-parent</artifactId>
    <version>2.7.3</version>
    <relativePath/> <!-- lookup parent from repository -->
</parent>
③parent功能
- 定义了 Java 编译版本为 1.8 。
- 使用 UTF-8 格式编码。
- 继承自 spring-boot-dependencies,这个里边定义了依赖的版本,也正是因为继承了这个依赖,所以我们在写4、依赖时才不需要写版本号。
- 执行打包操作的配置。
- 自动化的资源过滤。
- 自动化的插件配置。
- 针对 application.properties 和 application.yml 的资源过滤,包括通过 profile 定义的不同环境的配置文件,例如 application-dev.properties 和 application-dev.yml。
3.2 starter:减少依赖配置
①starter概述
SpringBoot把所有的技术使用的固定搭配格式都给开发出来,开发者使用的时候,就不用一次写一堆依赖了,直接用Spring Boot做好的这个东西就好了,对于这样的固定技术搭配,SpringBoot给它起了个名字叫做starter。starter定义了使用某种技术时对于依赖的固定搭配格式,也是一种最佳解决方案,使用starter可以帮助开发者减少依赖配置。
②Spring Boot项目中引用的starter
项目中的pom.xml定义了使用SpringMVC技术,但是并没有写SpringMVC的坐标,而是添加了一个名字中包含starter的依赖,在spring-boot-starter-web中又定义了若干个具体依赖的坐标。
<dependency>
    <groupId>org.springframework.boot</groupId>
    <artifactId>spring-boot-starter-web</artifactId>
</dependency>

<dependency>
    <groupId>org.springframework.boot</groupId>
    <artifactId>spring-boot-starter-test</artifactId>
    <scope>test</scope>
</dependency>
③starter与parent的区别
- starter是一个坐标中定了若干个坐标,以前写多个的,现在写一个,是用来减少依赖配置的书写量的。
- parent是定义了几百个依赖版本号,以前写依赖需要自己手工控制版本,现在由SpringBoot统一管理,这样就不存在版本冲突了,是用来减少依赖冲突的。
3.3 引导类
运行这个类就可以启动SpringBoot工程:
@SpringBootApplication
public class Springboot0101QuickstartApplication {
    public static void main(String[] args) {
        SpringApplication.run(Springboot0101QuickstartApplication.class, args);
    }
}
SpringBoot本身是为了加速Spring程序的开发的,而Spring程序运行的基础是需要创建自己的Spring容器对象(IoC容器)并将所有的对象交给Spring的容器管理,也就是一个一个的Bean。当前这个类运行后就会产生一个Spring容器对象,并且可以将这个对象保存起来,通过容器对象直接操作Bean。
@SpringBootApplication
public class Springboot01QuickstartApplication {
   public static void main(String[] args) {
      ConfigurableApplicationContext applicationContext = SpringApplication.run(Springboot01QuickstartApplication.class, args);
      UserController userController = applicationContext.getBean(UserController.class);
      System.out.println(userController);
   }
}
通过上述操作不难看出,其实SpringBoot程序启动还是创建了一个Spring容器对象。这个类在SpringBoot程序中是所有功能的入口,称这个类为引导类。作为一个引导类最典型的特征就是当前类上方声明了一个注解@SpringBootApplication打开该注解可以发现,这个类就是学习Spring的注解核心配置类。

3.4 内嵌tomcat
打开查看web的starter,发现有一个tomcat的starter,这里面有一个核心的坐标,tomcat-embed-core,叫做tomcat内嵌核心。就是这个东西把tomcat功能引入到了我们的程序中。

更换内嵌Tomcat
SpringBoot提供了3款内置的服务器
- tomcat(默认):apache出品,粉丝多,应用面广,负载了若干较重的组件
- jetty:更轻量级,负载性能远不及tomcat
- undertow:负载性能勉强跑赢tomcat
想用哪个,加个坐标就OK。前提是把tomcat排除掉,因为tomcat是默认加载的。
<dependencies>
    <dependency>
        <groupId>org.springframework.boot</groupId>
        <artifactId>spring-boot-starter-web</artifactId>
        <exclusions>
            <exclusion>
                <groupId>org.springframework.boot</groupId>
                <artifactId>spring-boot-starter-tomcat</artifactId>
            </exclusion>
        </exclusions>
    </dependency>
    <dependency>
        <groupId>org.springframework.boot</groupId>
        <artifactId>spring-boot-starter-jetty</artifactId>
    </dependency>
</dependencies>
现在就已经成功替换了web服务器,核心思想就是用什么加入对应坐标就可以了。如果有starter,优先使用starter。
4 Rest风格,RestFul开发
在学习Spring MVC时学过REST风格,但是讲课老师讲的不太深入,对于一些注解并没有进行讲解。于是重新复习一遍。
4.1 RESTFUL概述
RESTFUL是一种网络应用程序的设计风格和开发方式,基于HTTP,可以使用 XML 格式定义或 JSON 格式定义。最常用的数据格式是JSON。由于JSON能直接被JavaScript读取,所以,使用JSON格式的REST风格的API具有简单、易读、易用的特点。
- REST 是 Representational State Transfer 的缩写,如果一个架构符合 REST 原则,就称它为 RESTful 架构
- RESTful 架构可以充分的利用 HTTP 协议的各种功能,是 HTTP 协议的最佳实践。
- RESTful API 是一种软件架构风格、设计风格,可以让软件更加清晰,更简洁,更有层次,可维护性更好
4.2 RESTFUL API 请求设计
| 请求方式 | 含义 |
|---|---|
| GET(SELECT) | 从服务器取出资源(一项或多项) |
| POST(CREATE) | 在服务器新建一个资源 |
| PUT(UPDATE) | 在服务器更新资源(更新完整资源) |
| PATCH(UPDATE) | 在服务器更新资源, PATCH更新个别属性 |
| DELETE(DELETE) | 从服务器删除资源 |

4.3 在Spring MVC中使用RESTFUL开发设计
@Controller
public class ZoosController {

    @RequestMapping(value = "/zoos",method = RequestMethod.GET)
    @ResponseBody
    public String findAll(){
        System.out.println("ZoosController.findAll");
        return "zoosController.findAll";
    }

    @RequestMapping(value = "/zoos/{id}",method = RequestMethod.GET)
    @ResponseBody
    public String findOne(@PathVariable Integer id){
        System.out.println("ZoosController.findOne");
        return "zoosController.findOne";
    }

    @RequestMapping(value = "/zoos",method = RequestMethod.PUT)
    @ResponseBody
    public String update(@RequestBody Zoo zoo){
        System.out.println("ZoosController.update");
        return "zoosController.update";
    }

    @RequestMapping(value = "/zoos/{id}",method = RequestMethod.DELETE)
    @ResponseBody
    public String delete(@PathVariable Integer id){
        System.out.println("ZoosController.delete");
        return "zoosController.delete";
    }

    @RequestMapping(value = "/zoos",method = RequestMethod.POST)
    @ResponseBody
    public String insert(){
        System.out.println("ZoosController.insert");
        return "zoosController.insert";
    }
}
简化开发相关注解
| 注解 | 作用 |
|---|---|
| @RestController | 由 @Controller + @ResponseBody组成(返回 JSON 数据格式) |
| @PathVariable | URL 中的 {xxx} 占位符可以通过@PathVariable(“xxx“) 绑定到控制器处理方法的形参中 |
| @RequestMapping | 注解用于请求地址的解析,是最常用的一种注解 |
| @GetMapping | 查询请求 |
| @PostMapping | 添加请求 |
| @PutMapping | 更新请求 |
| @DeleteMapping | 删除请求 |
| @RequestParam | 将请求参数绑定到你控制器的方法参数上(是springmvc中接收普通参数的注解) |
@RestController
@RequestMapping("/zoos")
@ResponseBody
public class ZoosController {
    @GetMapping
    public String findAll(){
        System.out.println("ZoosController.findAll");
        return "zoosController.findAll";
    }
    @GetMapping(value = "/{id}")
    public String findOne(@PathVariable Integer id){
        System.out.println("ZoosController.findOne");
        return "zoosController.findOne";
    }
    @PutMapping
    public String update(@RequestBody Zoo zoo){
        System.out.println("ZoosController.update");
        return "zoosController.update";
    }
    @DeleteMapping(value = "/{id}")
    public String delete(@PathVariable Integer id){
        System.out.println("ZoosController.delete");
        return "zoosController.delete";
    }

    @PostMapping
    public String insert(){
        System.out.println("ZoosController.insert");
        return "zoosController.insert";
    }
}
5 SpringBoot基础配置
5.1 属性配置
SpringBoot通过配置文件application.properties就可以修改默认的配置,properties格式的文件书写规范是key=value。
- SpringBoot程序可以在application.properties文件中进行属性配置。
- application.properties文件中只要输入要配置的属性关键字就可以根据提示进行设置。
- SpringBoot将配置信息集中在一个文件中写,不管你是服务器的配置,还是数据库的配置,总之都写在一起,逃离一个项目十几种配置文件格式的尴尬局面。
更改端口号
# 服务器的端口配置
server.port=80
关闭运行日志图表(banner)
# 关闭banner
spring.main.banner-mode=off
# 修改banner
spring.banner.image.location=wallhaven-2879mg.png
设置运行日志的显示级别
# 日志
logging.level.root = error
5.2 配置文件分类
SpringBoot除了支持properties格式的配置文件,还支持另外两种格式的配置文件。分别如下:
- application.properties(properties格式)
server.port=80- application.yml(yml格式)
server:
port: 81- application.yaml(yaml格式)
server:
  port: 82
仔细看会发现yml格式和yaml格式除了文件名后缀不一样,格式完全一样,是这样的,yml和yaml文件格式就是一模一样的,只是文件后缀不同,所以可以合并成一种格式来看。
5.3 配置文件优先级
其实三个文件如果共存的话,谁生效说的就是配置文件加载的优先级别。
application.properties > application.yml > application.yaml配置文件间的加载优先级 properties(最高)> yml > yaml(最低),不同配置文件中相同配置按照加载优先级相互覆盖,不同配置文件中不同配置全部保留。
5.4 yaml文件的使用
YAML(YAML Ain't Markup Language),一种数据序列化格式。具有容易阅读、容易与脚本语言交互、以数据为核心,重数据轻格式的特点。
常见的文件扩展名有两种:
- .yml格式(主流)
- .yaml格式
对于文件自身在书写时,具有严格的语法格式要求,具体如下:
- 大小写敏感
- 属性层级关系使用多行描述,每行结尾使用冒号结束
- 使用缩进表示层级关系,同层级左侧对齐,只允许使用空格(不允许使用Tab键)
- 属性值前面添加空格(属性名与属性值之间使用冒号+空格作为分隔)
号 表示注释
常见的数据书写格式:
boolean: TRUE                          #TRUE,true,True,FALSE,false,False均可
float: 3.14                            #6.8523015e+5  #支持科学计数法
int: 123                               #0b1010_0111_0100_1010_1110    #支持二进制、八进制、十六进制
null: ~                                #使用~表示null
string: HelloWorld                  #字符串可以直接书写
string2: "Hello World"              #可以使用双引号包裹特殊字符
date: 2018-02-17                    #日期必须使用yyyy-MM-dd格式
datetime: 2018-02-17T15:02:31+08:00  #时间和日期之间使用T连接,最后使用+代表时区
subject:
    - Java
    - 前端
    - 大数据
enterprise:
    name: itcast
    age: 16
    subject:
        - Java
        - 前端
        - 大数据
likes: [王者荣耀,刺激战场]            #数组书写缩略格式
users:                             #对象数组格式一
  - name: Tom
       age: 4
  - name: Jerry
    age: 5
users:                             #对象数组格式二
  -
    name: Tom
    age: 4
  -
    name: Jerry
    age: 5
users2: [ { name:Tom , age:4 } , { name:Jerry , age:5 } ]    #对象数组缩略格式
5.5 yaml文件数据读取
读取单一数据
yaml中保存的单个数据,可以使用Spring中的注解直接读取,使用@Value可以读取单个数据,属性名引用方式:${一级属性名.二级属性名……}
address: 河南

user:
  userName: admin
  password: 123456

likes:
  - game
  - music
  - video

baseDir: c:\windows\system32

tempDir: ${baseDir}\temp
@RestController
@RequestMapping("/user")
public class UserController {
@Value("${address}")
private String address;
@Value("${user.userName}")
private String userName;
@Value("${likes[1]}")
private String likes1;
@Value("${tempDir}")
private String tempDir;
@GetMapping("/quick1")
public String findUsers() {
System.out.println("Spring boot is running");
System.out.println(address);
System.out.println(userName);
System.out.println(likes1);
System.out.println(tempDir);
}读取全部数据
SpringBoot提供了一个对象,能够把所有的数据都封装到这一个对象中,这个对象叫做Environment,使用自动装配注解可以将所有的yaml数据封装到这个对象中。
@RestController
@RequestMapping("/user")
public class UserController {
    //自动装配,把所有对象加载到environment对象中
    @Autowired
    private Environment environment;

    @GetMapping("/quick1")
    public String findUsers() {
        System.out.println("Spring boot is running");
        //使用environment获得yMl文件中的信息
        String address = environment.getProperty("address");
        System.out.println(address);
    }
}
读取对象数据
单一数据读取书写比较繁琐,全数据封装又封装的太厉害了,每次拿数据还要一个一个的getProperties(),总之用起来都不是很舒服。由于Java是一个面向对象的语言,很多情况下,我们会将一组数据封装成一个对象。SpringBoot也提供了可以将一组yaml对象数据封装一个Java对象的操作。
①首先定义一个对象,并将该对象纳入Spring管控的范围,也就是定义成一个bean,然后使用注解@ConfigurationProperties指定该对象加载哪一组yaml中配置的信息。
@Component
@ConfigurationProperties(prefix = "datasource")
public class MyDataSource {
    private String driver;
    private String url;
    private String username;
    private String password;

    @Override
    public String toString() {
        return "MyDataSource{" +
                "driver='" + driver + '\'' +
                ", url='" + url + '\'' +
                ", username='" + username + '\'' +
                ", password='" + password + '\'' +
                '}';
    }

    public String getDriver() {
        return driver;
    }

    public void setDriver(String driver) {
        this.driver = driver;
    }

    public String getUrl() {
        return url;
    }

    public void setUrl(String url) {
        this.url = url;
    }

    public String getUsername() {
        return username;
    }

    public void setUsername(String username) {
        this.username = username;
    }

    public String getPassword() {
        return password;
    }

    public void setPassword(String password) {
        this.password = password;
    }
}
这个@ConfigurationProperties必须告诉他加载的数据前缀是什么,这样当前前缀下的所有属性就封装到这个对象中。记得数据属性名要与对象的变量名一一对应啊,不然没法封装。其实以后如果你要定义一组数据自己使用,就可以先写一个对象,然后定义好属性,下面到配置中根据这个格式书写即可。
datasource:
  driver: com.mysql.cj.jdbc.Driver
  url: jdbc:mysql://localhost
  username: root
  password: 131411
5.6 yaml配置中遇到的问题
①配置yml文件时,设置键名为大写报错:
dataSource:
  driver: com.mysql.cj.jdbc.Driver
  url: jdbc:mysql://localhost
  username: root
  password: 131411
Invalid characters: 'S'
    Bean: userController
    Reason: Canonical names should be kebab-case ('-' separated), lowercase alpha-numeric characters and must start with a letter
无效字符:'S'
Bean:userController
原因:规范名称应为 kebab-case('-' 分隔)、小写字母数字字符且必须以字母开头
6 Spring Boot整合Junit
Spring整合JUnit的制作方式
@ContextConfiguration("classpath:applicationContext.xml")
@RunWith(SpringJUnit4ClassRunner.class)
public class TransactionManagerTest {
    @Autowired
    private AccountService accountService;

    @Test
    public void test() {
        accountService.transfer();
    }
}
@RunWith是设置Spring专用于测试的类运行器,简单说就是Spring程序执行程序有自己的一套独立的运行程序的方式,不能使用JUnit提供的类运行方式了,必须指定一下。
@ContextConfiguration是用来设置Spring核心配置文件或配置类的,简单说就是加载Spring的环境你要告诉Spring具体的环境配置是在哪里写的。
SpringBoot就抓住上述两条没有技术含量的内容书写进行开发简化,能走默认值的走默认值,能不写的就不写,具体格式如下:
①导入test的starter坐标
<dependency>
    <groupId>org.springframework.boot</groupId>
    <artifactId>spring-boot-starter-test</artifactId>
    <scope>test</scope>
</dependency>
②使用一个注解@SpringBootTest替换了前面两个注解。
@SpringBootTest
class SpringDemo1ApplicationTests {

    @Autowired
    private BookMapper bookMapper;

    @Test
    void contextLoads() {
        bookMapper.save();
    }

}
7 Spring Boot整合Mybatis
①创建模块时勾选要使用的技术,MyBatis,由于要操作数据库,还要勾选对应数据库

②配置数据源相关信息
spring:
  datasource:
    driver-class-name: com.mysql.cj.jdbc.Driver
    url: jdbc:mysql://localhost:3306/test
    username: root
password: 131411③使用Lombok创建实体类
@Data
public class User {
    private Integer id;
    private String username;
    private String password;
    private String gender;
    private String address;
}④创建映射接口
@Mapper
public interface UserMapper {
    @Select("select * from tb_user")
    List<User> findAll();
    @Insert("insert into tb_user(username, password, gender, address) values (#{username},#{password},#{gender},#{address})")
    void insert(User user);
    @Update("update tb_user set username = #{username} where id=#{id}")
    int update(@Param("username") String username, @Param("id") int id);
    @Delete("delete from tb_user where id=#{id}")
    void delete(int id);
}⑤进行测试
@SpringBootTest
class SpringBootMybatisApplicationTests {

    @Autowired
    private UserMapper userMapper;

    @Test
    void contextLoads() {
        List<User> userList = userMapper.findAll();
        for (User user : userList) {
            System.out.println(user);
        }
    }
    @Test
    void userInserts() {
        User user = new User();
        user.setUsername("刘畅");
        user.setPassword("1314");
        user.setGender("男");
        user.setAddress("河南");
        userMapper.insert(user);
    }
    @Test
    void userUpdates() {
        userMapper.update("六珍惜", 1);
    }

    @Test
    void userDeletes() {
        userMapper.delete(1);
    }
}⑥部分测试结果

8 Spring Boot整合Mybatis-plus
①导入对应的starter
<!-- https://mvnrepository.com/artifact/com.baomidou/mybatis-plus-boot-starter -->
<dependency>
    <groupId>com.baomidou</groupId>
    <artifactId>mybatis-plus-boot-starter</artifactId>
    <version>3.5.2</version>
</dependency>②配置数据源相关信息
spring:
  datasource:
    driver-class-name: com.mysql.cj.jdbc.Driver
    url: jdbc:mysql://localhost:3306/test
    username: root
password: 131411③创建映射接口
@Mapper
public interface UserMapper extends BaseMapper<User> {

}④进行测试
@SpringBootTest
class SpringBootMybatisplusApplicationTests {

    @Autowired
    private UserMapper userMapper;
    @Test
    void contextLoads() {
        List<User> userList = userMapper.selectList(null);
        for (User user : userList) {
            System.out.println(user);
        }
    }
    @Test
    void findUserById(){
        User user = userMapper.selectById(1);
        System.out.println(user);
    }
}
9 Spring Boot整合druid数据源
①导入对应的starter
<dependency>
    <groupId>com.alibaba</groupId>
    <artifactId>druid-spring-boot-starter</artifactId>
    <version>1.2.11</version>
</dependency>②配置数据源相关信息
spring:
 datasource:
  druid:
    driver-class-name: com.mysql.cj.jdbc.Driver
    url: jdbc:mysql://localhost:3306/test
    username: root
password: 131411③创建映射接口
@Mapper
public interface UserMapper {
    @Select("select * from tb_user")
    List<User> findAll();
    @Insert("insert into tb_user(username, password, gender, address) values (#{username},#{password},#{gender},#{address})")
    void insert(User user);
    @Update("update tb_user set username = #{username} where id=#{id}")
    int update(@Param("username") String username, @Param("id") int id);
    @Delete("delete from tb_user where id=#{id}")
    void delete(int id);
}④进行测试
@SpringBootTest
class SpringBootMybatisApplicationTests {

    @Autowired
    private UserMapper userMapper;

    @Test
    void contextLoads() {
        List<User> userList = userMapper.findAll();
        for (User user : userList) {
            System.out.println(user);
        }
    }
    @Test
    void userInserts() {
        User user = new User();
        user.setUsername("刘畅");
        user.setPassword("1314");
        user.setGender("男");
        user.setAddress("河南");
        userMapper.insert(user);
    }
    @Test
    void userUpdates() {
        userMapper.update("六珍惜", 1);
    }

    @Test
    void userDeletes() {
        userMapper.delete(1);
    }
}
学习总结:
本周学习进度有些慢,本周主要学习了Spring Boot基础篇的相关知识。通过本次的学习,对SpringMVC的相关知识更加的熟悉;通过进行SSM整合,使用注解开发Spring程序更加得心应手;对于Spring Boot的学习,必须要打牢Spring的基础,只要有牢固的Spring基础,SpringBoot的开发更加的简单。
下周学习计划:
完成Spring Boot基础篇、运维实用篇等课程。由于临近开学,需要整理解决一些开学事务,导致学习时间有所减少,SpringBoot的课程在开学前无法学习完毕,不过在开学后会尽快完成任务,达到Java全栈初级工程师水平。继续努力!
SpringBoot学习笔记 2
1 基于Spring Boot整合SSMP
1.1 模块创建

导入MyBatisPlus与Druid对应的starter,当然mysql的驱动不能少
<dependency>
    <groupId>com.baomidou</groupId>
    <artifactId>mybatis-plus-boot-starter</artifactId>
    <version>3.5.2</version>
</dependency>
<dependency>
    <groupId>com.alibaba</groupId>
    <artifactId>druid-spring-boot-starter</artifactId>
    <version>1.1.10</version>
</dependency>
1.2 数据层开发
①创建实体类:User
@Data
public class User {
    private Integer id;
    private String username;
    private String password;
    private String gender;
    private String address;
}
②配置数据源
server:
  port: 80

spring:
  datasource:
    druid:
      driver-class-name: com.mysql.cj.jdbc.Driver
      url: jdbc:mysql://localhost:3306/test
      username: root
      password: 131411

mybatis-plus:
  global-config:
    db-config:
      table-prefix: tb_
③编写映射接口
@Mapper
public interface UserMapper extends BaseMapper<User> {
}
④测试
@SpringBootTest
public class UserMapperTest {
    @Autowired
    private UserMapper userMapper;

    @Test
    public void test(){
        List<User> userList = userMapper.selectList(null);
        for (User user : userList) {
            System.out.println(user);
        }
    }
    @Test
    public void test2(){
        User user = userMapper.selectById(1);
        System.out.println(user);
    }
    @Test
    public void test3(){
        User user = new User();
        user.setUsername("齐大");
        user.setPassword("0000");
        user.setGender("男");
        user.setAddress("齐齐哈尔");
        userMapper.insert(user);
    }
    @Test
    public void test4(){
        userMapper.deleteById(191561735);
    }

    @Test
    public void test5(){
        User user = new User();
        user.setId(15);
        user.setUsername("郑大");
        user.setPassword("0000");
        user.setGender("男");
        user.setAddress("河南郑州");
        userMapper.updateById(user);
    }
}发现问题一:自动增长的Id值太大。

解决方式一:通过配置的方式:
mybatis-plus:
  global-config:
    db-config:
      table-prefix: tb_
      id-type: auto   #设置主键id字段的生成策略为参照数据库设定的策略,当前数据库设置id生成策略为自增
解决方式二:通过注解:
在实体类User类的id属性上添加此注解。
@TableId(value = "id", type = IdType.AUTO)
private Integer id;
发现问题二:控制台没有打印SQL语句,不利于查看
解决方式:通过配置的形式就可以查阅执行期SQL语句,配置如下:
mybatis-plus:
  global-config:
    db-config:
      table-prefix: tb_
      id-type: auto
  configuration:
    log-impl: org.apache.ibatis.logging.stdout.StdOutImpl # 开启打印日志
⑤分页查询测试
前面仅仅是使用了MP提供的基础CRUD功能,实际上MP给我们提供了几乎所有的基础操作。
其中selectPage方法需要传入一个封装分页数据的对象,可以通过new的形式创建这个对象,当然这个对象也是MP提供的。创建此对象时就需要指定分页的两个基本数据
- 当前显示第几页
- 每页显示几条数据
可以通过创建Page对象时利用构造方法初始化这两个数据
IPage page = new Page(2,5);将该对象传入到查询方法selectPage后,可以得到查询结果,但是我们会发现当前操作查询结果返回值仍然是一个IPage对象。
IPage page = bookDao.selectPage(page, null);原来这个IPage对象中封装了若干个数据,而查询的结果作为IPage对象封装的一个数据存在的,可以理解为查询结果得到后,又塞到了这个IPage对象中,其实还是为了高度的封装,一个IPage描述了分页所有的信息。下面5个操作就是IPage对象中封装的所有信息了。
@Test
public void test6() {
    IPage<User> page = new Page<User>(1,5);
    userMapper.selectPage(page,null);
    System.out.println(page.getCurrent());
    System.out.println(page.getSize());
    System.out.println(page.getPages());
    System.out.println(page.getTotal());
    System.out.println(page.getRecords());
}
到这里就知道这些数据如何获取了,但是当你去执行这个操作时,你会发现并不像我们分析的这样,实际上这个分页当前是无效的。为什么这样呢?这个要源于MP的内部机制。
对于MySQL的分页操作使用limit关键字进行,而并不是所有的数据库都使用limit关键字实现的,这个时候MP为了制作的兼容性强,将分页操作设置为基础查询操作的升级版,你可以理解为IPhone6与IPhone6S-PLUS的关系。
基础操作中有查询全部的功能,而在这个基础上只需要升级一下(PLUS)就可以得到分页操作。所以MP将分页操作做成了一个开关,你用分页功能就把开关开启,不用就不需要开启这个开关。而我们现在没有开启这个开关,所以分页操作是没有的。这个开关是通过MP的拦截器的形式存在的,其中的原理这里不分析了,有兴趣的小伙伴可以学习MyBatisPlus这门课程进行详细解读。具体设置方式如下
定义MP拦截器并将其设置为Spring管控的bean
@Configuration
public class MPConfig {
    @Bean
    public MybatisPlusInterceptor mybatisPlusInterceptor(){
        MybatisPlusInterceptor interceptor = new MybatisPlusInterceptor();
        interceptor.addInnerInterceptor(new PaginationInnerInterceptor());
        return interceptor;
    }
}
上述代码第一行是创建MP的拦截器栈,这个时候拦截器栈中没有具体的拦截器,第二行是初始化了分页拦截器,并添加到拦截器栈中。如果后期开发其他功能,需要添加全新的拦截器,按照第二行的格式继续add进去新的拦截器就可以了。

⑥按条件查询
模糊匹配对应的操作,由like条件书写变为了like方法的调用。
@Test
public void test7() {
    QueryWrapper<User> queryWrapper = new QueryWrapper<>();
    queryWrapper.like("username","刘");
    userMapper.selectList(queryWrapper);
}
第一句QueryWrapper对象是一个用于封装查询条件的对象,该对象可以动态使用API调用的方法添加条件,最终转化成对应的SQL语句。第二句就是一个条件了,需要什么条件,使用QueryWapper对象直接调用对应操作即可。比如做大于小于关系,就可以使用lt或gt方法,等于使用eq方法,等等。
这组API使用还是比较简单的,但是关于属性字段名的书写存在着安全隐患,比如查询字段name,当前是以字符串的形态书写的,万一写错,编译器还没有办法发现,只能将问题抛到运行器通过异常堆栈告诉开发者,不太友好。MP针对字段检查进行了功能升级,全面支持Lambda表达式,就有了下面这组API。由QueryWrapper对象升级为LambdaQueryWrapper对象,这下就解决了上述问题的出现。
@Test
public void test8() {
    String name = "liu";
    LambdaQueryWrapper<User> queryWrapper = new LambdaQueryWrapper<>();
    queryWrapper.like(name!=null,User::getUsername,name);
    userMapper.selectList(queryWrapper);
}
1.3 业务层开发
传统业务层开发
①业务层接口定义
public interface UserService {
    Boolean save(User user);
    Boolean update(User user);
    Boolean delete(Integer id);
    User findById(Integer id);
    List<User> getUsers();
    IPage<User> getPages(int currentPage, int pageSize);
}
②业务层实现类如下,转调数据层即可
@Service
public class UserServiceImpl implements UserService {

    @Autowired
    private UserMapper userMapper;

    @Override
    public Boolean save(User user) {
        return userMapper.insert(user) > 0;
    }

    @Override
    public Boolean update(User user) {
        return userMapper.updateById(user) > 0;
    }

    @Override
    public Boolean delete(Integer id) {
        return userMapper.deleteById(user) > 0;
    }

    @Override
    public User findById(Integer id) {
        return userMapper.selectById(id);
    }

    @Override
    public List<User> getUsers() {
        return userMapper.selectList(null);
    }

    @Override
    public IPage<User> getPages(int currentPage, int pageSize) {
        Page<User> page = new Page<>();
        return userMapper.selectPage(page,null);
    }
}
③对业务层接口进行测试
@SpringBootTest
public class UserServiceTest {

    @Autowired
    private UserService userService;

    @Test
    public void test() {
        System.out.println(userService.findById(1));
    }
    @Test
    public void test2() {
        IPage<User> page = userService.getPages(1, 5);
        System.out.println(page.getRecords());
    }
    @Test
    public void test3() {
        List<User> userList = userService.getUsers();
        for (User user : userList) {
            System.out.println(user);
        }
    }
    @Test
    public void test4() {
        User user = new User();
        user.setId(15);
        user.setUsername("郑大");
        user.setPassword("0000");
        user.setGender("男");
        user.setAddress("河南郑州");
        userService.save(user);
    }
    @Test
    public void test5() {
        User user = new User();
        user.setId(15);
        user.setUsername("he");
        user.setPassword("0000");
        user.setGender("男");
        user.setAddress("河南郑州");
        userService.update(user);
    }
}
使用mybatis-plus业务层快速开发
MP技术不仅提供了数据层快速开发方案,业务层MP也给了一个通用接口,实际开发慎用。
①业务层接口快速开发
public interface IUserService extends IService<User> {
}
②业务层接口实现类快速开发,关注继承的类需要传入两个泛型,一个是数据层接口,另一个是实体类
@Service
public class IUserServiceImpl extends ServiceImpl<UserMapper, User> implements IUserService {

}
③对业务层快速开发接口进行测试
@SpringBootTest
public class IUserServiceTest {

    @Autowired
    private IUserService userService;

    @Test
    public void test() {

        System.out.println(userService.getById(1));
    }
    @Test
    public void test2() {
        IPage<User> page = new Page<User>(1, 5);
        userService.page(page);
        System.out.println(page.getRecords());
    }
    @Test
    public void test3() {
        List<User> userList = userService.list();
        for (User user : userList) {
            System.out.println(user);
        }
    }
    @Test
    public void test4() {
        User user = new User();
        user.setId(15);
        user.setUsername("郑大");
        user.setPassword("0000");
        user.setGender("男");
        user.setAddress("河南郑州");
        userService.save(user);
    }
    @Test
    public void test5() {
        User user = new User();
        user.setId(15);
        user.setUsername("he");
        user.setPassword("0000");
        user.setGender("男");
        user.setAddress("河南郑州");
        userService.updateById(user);
    }
    @Test
    public void test6() {
        userService.removeById(16);
    }
}
1.4 表现层开发
不规范的表现层开发如下
①编写表现层相关方法
@RestController
@RequestMapping("/users")
public class UserController {

    @Autowired
    private IUserService userService;

    @GetMapping
    public List<User> getUsers() {
        return userService.list();
    }

    @PostMapping
    public Boolean save(@RequestBody User user) {
        return userService.save(user);
    }

    @PutMapping
    public Boolean update(@RequestBody User user) {
        return userService.updateById(user);
    }

    @DeleteMapping("/{id}")
    public Boolean delete(@PathVariable Integer id) {
        return userService.removeById(id);
    }
    @GetMapping("/{id}")
    public User getUser(@PathVariable Integer id) {
        return userService.getById(id);
    }

    @GetMapping("/{currentPage}/{pageSize}")
    public IPage<User> getPages(@PathVariable int currentPage,@PathVariable int pageSize) {
        return userService.getPages(currentPage, pageSize);
    }
}
②使用PostMan进行测试:


为什么说是不规范呢?
目前我们通过Postman测试后业务层接口功能时通的,但是这样的结果给到前端开发者会出现一个小问题。不同的操作结果所展示的数据格式差异化严重。每种不同操作返回的数据格式都不一样,而且还不知道以后还会有什么格式,这样的结果让前端人员看了是很容易让人崩溃的,必须将所有操作的操作结果数据格式统一起来,需要设计表现层返回结果的模型类,用于后端与前端进行数据格式统一,也称为前后端数据协议。
规范表现层的开发
①创建一个标准的返回类型R,其中flag用于标识操作是否成功,data用于封装操作数据
package com.liu.controller.utils;

import lombok.Data;

/**
 * @author LiuChang
 * @version 1.0.0
 * @description TODO
 * @date 2022/8/26 10:03
 */
@Data
public class R {
    private boolean flag;
    private Object data;

    public R() {
    }

    public R(boolean flag) {
        this.flag = flag;
    }

    public R(boolean flag, Object data) {
        this.flag = flag;
        this.data = data;
    }
}
②规范表现层方法
@RestController
@RequestMapping("/users")
public class UserController {

    @Autowired
    private IUserService userService;


    @GetMapping
    public R getUsers() {
        return new R(true,userService.list());
    }

    @PostMapping
    public R save(@RequestBody User user) {
        return new R(userService.save(user));
    }

    @PutMapping
    public R update(@RequestBody User user) {
        return new R(userService.updateById(user));
    }

    @DeleteMapping("/{id}")
    public R delete(@PathVariable Integer id) {
        return new R(userService.removeById(id));
    }

    @GetMapping("/{id}")
    public R getUser(@PathVariable Integer id) {
        return new R(true,userService.getById(id));
    }

    @GetMapping("/{currentPage}/{pageSize}")
    public R getPages(@PathVariable int currentPage,@PathVariable int pageSize) {
        return new R(true,userService.getPages(currentPage, pageSize));
    }
}
1.5 页面基础功能开发
①查询所有功能
页面添加条件字段对应的数据模型绑定名称
<el-table size="small" current-row-key="id" :data="dataList" stripe highlight-current-row>
    <el-table-column type="index" align="center" label="序号"></el-table-column>
    <el-table-column prop="username" label="用户名称" align="center"></el-table-column>
    <el-table-column prop="password" label="用户密码" align="center"></el-table-column>
    <el-table-column prop="gender" label="用户性别" align="center"></el-table-column>
    <el-table-column prop="address" label="用户地址" align="center"></el-table-column>
    <el-table-column label="操作" align="center">
        <template slot-scope="scope">
            <el-button type="primary" size="mini" @click="handleUpdate(scope.row)">编辑</el-button>
               <el-button type="danger" size="mini" @click="handleDelete(scope.row)">删除</el-button>
        </template>
    </el-table-column>
</el-table>
页面封装字段
data:{
    dataList: [],//当前页要展示的列表数据
}
编写方法获取数据
//钩子函数,VUE对象初始化完成后自动执行
created() {
    this.getAll();
},
//列表
getAll() {
    axios.get("/users").then((res)=>{
        console.log(res.data);
        this.dataList = res.data.data;
    })
},
②添加功能
页面添加条件字段对应的数据模型绑定名称
<!-- 新增标签弹层 -->
<div class="add-form">
    <el-dialog title="新增用户" :visible.sync="dialogFormVisible">
        <el-form ref="dataAddForm" :model="formData" :rules="rules" label-position="right" label-width="100px">
            <el-row>
                <el-col :span="12">
                    <el-form-item label="用户名称" prop="username">
                        <el-input v-model="formData.username"/>
                    </el-form-item>
                </el-col>
                <el-col :span="12">
                    <el-form-item label="用户密码" prop="password">
                        <el-input v-model="formData.password"/>
                    </el-form-item>
                </el-col>
                <el-col :span="12">
                    <el-form-item label="用户性别" prop="gender">
                        <el-input v-model="formData.gender"/>
                    </el-form-item>
                </el-col>
            </el-row>
            <el-row>
                <el-col :span="24">
                    <el-form-item label="地址">
                        <el-input v-model="formData.address" type="address"></el-input>
                    </el-form-item>
                </el-col>
            </el-row>
        </el-form>
        <div slot="footer" class="dialog-footer">
            <el-button @click="cancel()">取消</el-button>
            <el-button type="primary" @click="handleAdd()">确定</el-button>
        </div>
    </el-dialog>
</div>
页面封装字段
data:{
    dialogFormVisible: false,//添加表单是否可见
    formData: {},//表单数据
}
编写方法插入数据
//弹出添加窗口
handleCreate() {
    this.dialogFormVisible = true;
    this.resetForm();
},

//重置表单
resetForm() {
    this.formData = {};
},

//添加
handleAdd () {
    axios.post("/users",this.formData).then((res)=> {
        //判断当前操作是否成功
        if (res.data.flag) {
            this.dialogFormVisible = false;
            this.$message.success("添加成功");
        }else {
            this.$message.error("添加失败");
        }
    }).finally(()=> {
        this.getAll();
    })
},

//取消
cancel(){
    this.dialogFormVisible = false;
    this.$message.info("操作取消");
},
③删除功能
页面添加条件字段对应的数据模型绑定名称
<el-button type="danger" size="mini" @click="handleDelete(scope.row)">删除</el-button>编写方法删除数据
// 删除
handleDelete(row) {
    console.log(row);

    this.$confirm("是否删除?","提示",{type:"info",}).then(()=>{
        axios.delete("/users/"+row.id).then((res)=>{
            if (res.data.flag) {
                this.$message.success("删除成功");
            }else {
                this.$message.error("删除失败");
            }
        }).finally(()=> {
            this.getAll();
        })
    }).catch(()=>{
        this.$message.info("取消操作");
    })
},
④修改操作
页面添加条件字段对应的数据模型绑定名称
<el-button type="primary" size="mini" @click="handleUpdate(scope.row)">编辑</el-button>
 <div class="add-form">
                <el-dialog title="编辑检查项" :visible.sync="dialogFormVisible4Edit">
                   <el-form ref="dataEditForm" :model="formData" :rules="rules" label-position="right" label-width="100px">
                        <el-row>
                            <el-col :span="12">
                                <el-form-item label="用户名称" prop="username">
                                    <el-input v-model="formData.username"/>
                                </el-form-item>
                            </el-col>
                            <el-col :span="12">
                                <el-form-item label="用户密码" prop="password">
                                    <el-input v-model="formData.password"/>
                                </el-form-item>
                            </el-col>
                           <el-col :span="12">
                                <el-form-item label="用户性别" prop="gender">
                                    <el-input v-model="formData.gender"/>
                                </el-form-item>
                            </el-col>
                        </el-row>
                        <el-row>
                            <el-col :span="24">
                                <el-form-item label="地址">
                                    <el-input v-model="formData.address" type="address"></el-input>
                                </el-form-item>
                            </el-col>
                        </el-row>
                    </el-form>
                    <div slot="footer" class="dialog-footer">
                       <el-button @click="cancel()">取消</el-button>
                        <el-button type="primary" @click="handleEdit()">确定</el-button>
                    </div>
                </el-dialog>
            </div>
页面封装字段
data:{
    dialogFormVisible4Edit:false,//编辑表单是否可见
}
编写方法更新数据
//弹出编辑窗口
handleUpdate(row) {
    axios.get("/users/" + row.id).then((res)=>{
        if (res.data.flag && res.data.data!=null) {
            this.dialogFormVisible4Edit = true;
            this.formData = res.data.data;
        }else {
            this.$message.error("数据同步失败,自动刷新");
        }
    }).finally(()=> {
        this.getAll();
    });
},

//修改
handleEdit() {
    axios.put("/users",this.formData).then((res)=> {
        //判断当前操作是否成功
        if (res.data.flag) {
            this.dialogFormVisible4Edit = false;
            this.$message.success("修改成功");
        }else {
            this.$message.error("修改失败");
        }
    }).finally(()=> {
        this.getAll();
    })
},
⑤分页查询
页面添加条件字段对应的数据模型绑定名称
<!--分页组件-->
<div class="pagination-container">
    <el-pagination
            class="pagiantion"
            @current-change="handleCurrentChange"
            :current-page="pagination.currentPage"
            :page-size="pagination.pageSize"
            layout="total, prev, pager, next, jumper"
            :total="pagination.total">
    </el-pagination>
</div>
页面封装字段
data:{
    pagination: {//分页相关模型数据
    currentPage: 1,//当前页码
    pageSize:10,//每页显示的记录数
    total:0,//总记录数
}
编写方法分页查询数据
//列表
getAll() {
    axios.get("/users/"+this.pagination.currentPage+"/"+this.pagination.pageSize).then((res)=>{
        this.pagination.currentPage = res.data.data.current;
        this.pagination.pageSize = res.data.data.size;
        this.pagination.total = res.data.data.total;
        this.dataList = res.data.data.records;
    })
},
//切换页码
handleCurrentChange(currentPage) {
    this.pagination.currentPage = currentPage;
    this.getAll();
⑥条件查询
LambdaQueryWrapper<User> queryWrapper = new LambdaQueryWrapper<>();
queryWrapper.like(Strings.isNotEmpty(user.getUsername()),User::getUsername,user.getUsername());
queryWrapper.like(Strings.isNotEmpty(user.getPassword()),User::getPassword,user.getPassword());
queryWrapper.like(Strings.isNotEmpty(user.getGender()),User::getGender,user.getGender());
queryWrapper.like(Strings.isNotEmpty(user.getAddress()),User::getAddress,user.getAddress());
getAll() {
//1.获取查询条件,拼接查询条件
param = "?username="+this.pagination.username;
param += "&password="+this.pagination.password;
param += "&gender="+this.pagination.gender;
param += "&address="+this.pagination.address;
axios.get("/users/"+this.pagination.currentPage+"/"+this.pagination.pageSize+param).then((res)=>{
this.pagination.currentPage = res.data.data.current;
this.pagination.pageSize = res.data.data.size;
this.pagination.total = res.data.data.total;
this.dataList = res.data.data.records;
})
},2 Spring Boot项目打包
<plugin>
    <groupId>org.springframework.boot</groupId>
    <artifactId>spring-boot-maven-plugin</artifactId>
    <configuration>
        <excludes>
            <exclude>
                <groupId>org.projectlombok</groupId>
                <artifactId>lombok</artifactId>
            </exclude>
        </excludes>
    </configuration>
</plugin>


Spring Boot的jar包在Window环境中运行:

Spring Boot的jar包在Linux环境中运行:
先查看了自己的ubuntu系统版本号:

进入IDEA查看Maven自己是否配置成功:

查看java版本号:

使用Linux环境运行SpringBoot的jar包:


运行成功之后发现了相关错误:可以看到是由于用户权限不够,于是使用sudo加权


加权后发现本数据库中没有相关表,于是直接运行相关sql语句:


再次运行可以发现项目已经成功跑出来了:

可以看到后台输出的日志:

3 临时属性配置
SpringBoot提供了灵活的配置方式,如果你发现你的项目中有个别属性需要重新配置,可以使用临时属性的方式快速修改某些配置。
- 在启动的时候添加上对应参数就可以了。

- 打开SpringBoot引导类的运行界面,在里面找到配置项。其中Program arguments对应的位置就是添加临时属性的。

对于IDEA没有出现的需要在Add中寻找:

可以看到端口号已经修改成了8080端口:

- 也可以在启动类中进行相关设置:

4 SpringBoot高级配置
4.1 SpringBoot加载第三方Bean
使用@ConfigurationProperties注解其实可以为第三方bean加载属性。
@Component
@Data
@ConfigurationProperties(prefix = "servers")
public class ServletConfig {
    private String ipAddress;
    private int port;
    private long timeout;
}
servers:
ipAddress: 192.168.1.2
port: 8080
timeout: 30
datasource:
driverClassName: com.mysql.jdbc.cj.Driver@SpringBootApplication
public class Springboot13configurationApplication {
//加载第三方Bean
@Bean
@ConfigurationProperties(prefix = "datasource")
public DruidDataSource dataSource(){
DruidDataSource dataSource = new DruidDataSource();
return dataSource;
}
public static void main(String[] args) {
ConfigurableApplicationContext context = SpringApplication.run(Springboot13configurationApplication.class, args);
ServletConfig config = context.getBean(ServletConfig.class);
System.out.println(config);
DruidDataSource dataSource = context.getBean(DruidDataSource.class);
System.out.println(dataSource.getDriverClassName());
}
}
绑定第三方数据源:
@DurationUnit(ChronoUnit.HOURS)
private Duration serverTimeout;
@DataSizeUnit(DataUnit.KILOBYTES)
private DataSize dataSize;
servers:
ipAddress: 192.168.1.2
port: 8080
timeout: 30
serverTimeout: 3
dataSize: 128
4.2 校验配置
SpringBoot给出了强大的数据校验功能,可以有效的避免此类问题的发生。在JAVAEE的JSR303规范中给出了具体的数据校验标准,开发者可以根据自己的需要选择对应的校验框架,此处使用Hibernate提供的校验框架来作为实现进行数据校验。
<!--导入JSP303规范-->
<dependency>
    <groupId>javax.validation</groupId>
    <artifactId>validation-api</artifactId>
</dependency>
<dependency>
    <groupId>org.hibernate.validator</groupId>
    <artifactId>hibernate-validator</artifactId>
</dependency>
@Component
@Data
@ConfigurationProperties(prefix = "servers")
//开启对当前Bean的属性注入校验
@Validated
public class ServletConfig {
private String ipAddress;
@Max(value = 8888,message = "最大值不能超过8888")
@Min(value = 202,message = "最小值不能小于202")
private int port;
private long timeout;
@DurationUnit(ChronoUnit.HOURS)
private Duration serverTimeout;
@DataSizeUnit(DataUnit.KILOBYTES)
private DataSize dataSize;
}
4.3 测试配置
加载测试专用配置
@Configuration
public class MsgConfig {
    @Bean
    public String msg() {
        return "Bean msg";
    }
}
@SpringBootTest
@Import({MsgConfig.class})
public class ConfigurationTest {
@Autowired
private String msg;
@Test
void test1(){
System.out.println(msg);
}
}测试类中启动web环境
@RestController
@RequestMapping("/books")
public class BookController {
    @GetMapping
    public String getById(){
        System.out.println("getById() called");
        return "springboot";
    }
}
//开启web环境
@SpringBootTest(webEnvironment = SpringBootTest.WebEnvironment.RANDOM_PORT)
//开启虚拟调用MVC
@AutoConfigureMockMvc
public class WebTest {
@Test
void testWeb(@Autowired MockMvc mvc) throws Exception {
//执行get请求
MockHttpServletRequestBuilder builder = MockMvcRequestBuilders.get("/books");
mvc.perform(builder);
}
}
匹配响应执行状态
@Test
void testStatus(@Autowired MockMvc mvc) throws Exception {
    MockHttpServletRequestBuilder builder = MockMvcRequestBuilders.get("/books1");
    ResultActions actions = mvc.perform(builder);
    //设定预期值,与真实的值进行比较,成功测试通过,失败测试失败
    StatusResultMatchers status = MockMvcResultMatchers.status();
    //预计本次调用时成功的:状态码为200
    ResultMatcher ok = status.isOk();
    //添加预计值到本次调用过程中进行匹配
    actions.andExpect(ok);
}
匹配响应体
@Test
void testBody(@Autowired MockMvc mvc) throws Exception {
    MockHttpServletRequestBuilder builder = MockMvcRequestBuilders.get("/books");
    ResultActions actions = mvc.perform(builder);
    //设定预期值,与真实的值进行比较,成功测试通过,失败测试失败
    ContentResultMatchers content = MockMvcResultMatchers.content();
    //预计本次调用时成功的:body
    ResultMatcher result = content.string("springboot1");
    //添加预计值到本次调用过程中进行匹配
    actions.andExpect(result);
}
匹配json响应体格式:
@Test
void testBody(@Autowired MockMvc mvc) throws Exception {
    MockHttpServletRequestBuilder builder = MockMvcRequestBuilders.get("/books");
    ResultActions actions = mvc.perform(builder);
    //设定预期值,与真实的值进行比较,成功测试通过,失败测试失败
    ContentResultMatchers content = MockMvcResultMatchers.content();
    //预计本次调用时成功的:body
    ResultMatcher result = content.json("{\"name\":\"瓦尔登湖\",\"id\":1,\"type\":\"自然科学\",\"description\":\"一位隐士记录生活\"}");
    //添加预计值到本次调用过程中进行匹配
    actions.andExpect(result);
}
匹配响应头
@Test
void testContentType(@Autowired MockMvc mvc) throws Exception {
    MockHttpServletRequestBuilder builder = MockMvcRequestBuilders.get("/books");
    ResultActions actions = mvc.perform(builder);
    //设定预期值,与真实的值进行比较,成功测试通过,失败测试失败
    HeaderResultMatchers header = MockMvcResultMatchers.header();
    ResultMatcher matcher = header.string("Content-Type", "application/json");
    //添加预计值到本次调用过程中进行匹配
    actions.andExpect(matcher);
}
业务层测试事务回滚
@SpringBootTest
//Spring添加事务注解
@Transactional
@Rollback(true)
class SpringBootMybatisApplicationTests {

    @Autowired
    private UserMapper userMapper;

    @Test
    void userInserts() {
        User user = new User();
        user.setUsername("刘畅");
        user.setPassword("1314");
        user.setGender("男");
        user.setAddress("河南");
        userMapper.insert(user);
    }
}
测试用例设置随机数据
testcase:
  user:
    id: ${random.int}
    username: ${random.value}
    password: ${random.value}
    gender: ${random.value}
    address: ${random.value}
@SpringBootTest
//Spring添加事务注解
@Transactional
@Rollback(true)
class SpringBootMybatisApplicationTests {
@Autowired
private UserMapper userMapper;
@Autowired
private User user;
@Test
public void test(){
System.out.println(user.getId());
System.out.println(user.getUsername());
System.out.println(user.getPassword());
System.out.println(user.getGender());
System.out.println(user.getAddress());
}
}
4.4 数据层解决方案
配置内嵌Hikari数据源
spring:
  datasource:
    url: jdbc:mysql://localhost:3306/test
    hikari:
      driver-class-name: com.mysql.cj.jdbc.Driver
      username: root
      password: 131411
配置内嵌 H2数据库:
<dependency>
    <groupId>com.h2database</groupId>
    <artifactId>h2</artifactId>
</dependency>
<dependency>
    <groupId>org.springframework.boot</groupId>
    <artifactId>spring-boot-starter-data-jpa</artifactId>
</dependency>
spring:
h2:
console:
path: /h2
enabled: true
datasource:
url: jdbc:h2:~/test
hikari:
driver-class-name: org.h2.Driver
username: sa
password: 123456
mybatis-plus:
global-config:
db-config:
table-prefix: tb_
server:
port: 80连接H2数据库:

进入H2数据库界面:

查询表操作:

创建表操作:

插入表数据操作:

查询所有操作:

发生报错:
Database may be already in use: "C:/Users/77339/test.mv.db". Possible solutions: close all other connection(s); use the server mode [90020-214]经过查询发现:是数据库被占用,将服务器停掉之后,问题就解决掉了。


NoSQL:
Redis与SpringBoot框架结合:


创建新模块,选择Redis缓存。

spring:
  redis:
    host: localhost
    port: 6379
    client-type: jedis
@SpringBootTest
class SpringBootRedisApplicationTests {
@Autowired
private RedisTemplate redisTemplate;
@Test
void set() {
ValueOperations ops = redisTemplate.opsForValue();
ops.set("age",23);
}
@Test
void get() {
ValueOperations ops = redisTemplate.opsForValue();
Object age = ops.get("age");
System.out.println(age);
}
@Test
void setHash(){
HashOperations hash = redisTemplate.opsForHash();
hash.put("info","a","aa");
}
@Test
void getHash(){
HashOperations hash = redisTemplate.opsForHash();
Object o = hash.get("info", "a");
System.out.println(o);
}
}@SpringBootTest
public class StringRedis {
@Autowired
private StringRedisTemplate stringRedisTemplate;
@Test
void get() {
ValueOperations<String, String> ops = stringRedisTemplate.opsForValue();
String name = ops.get("name");
System.out.println(name);
}
}
ES分布式全文搜索引擎
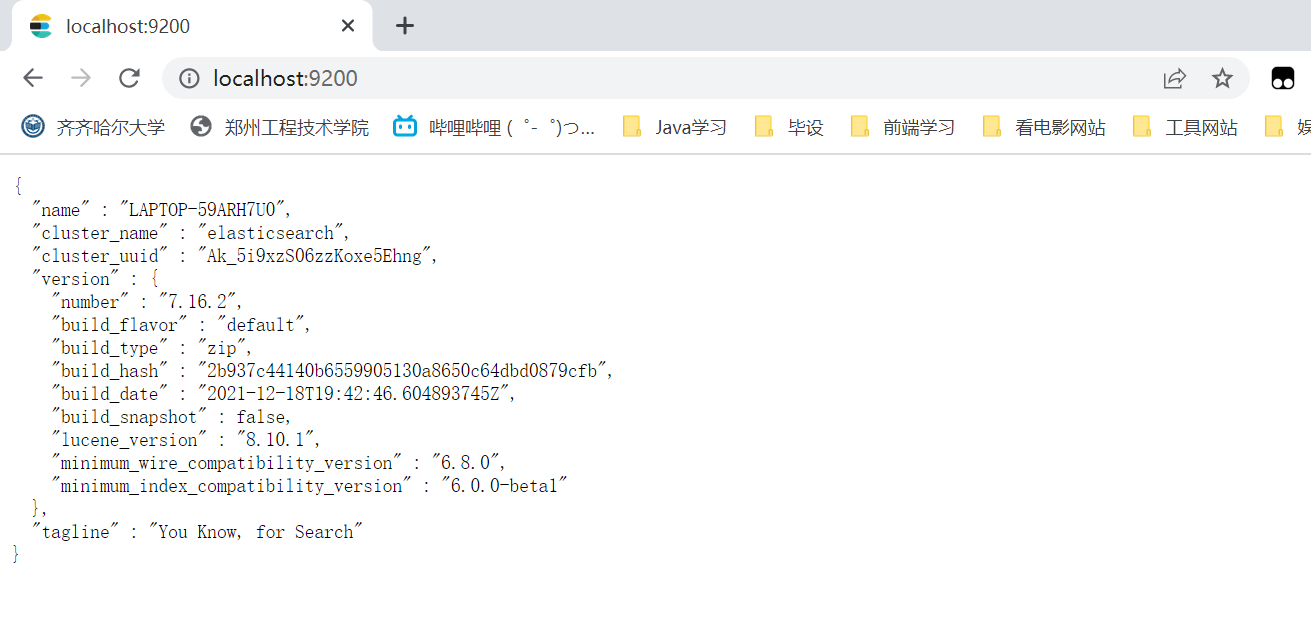
1.启动ES

2.操作索引

评论已关闭